
Infrastructure Protection: Root Barriers
Have you noticed uneven bricks at a patio near Irene or by Centurion Mall and wondered whether tree roots lifting paving Centurion might be to blame?
We tackle this common Centurion scenario with a clear, practical how-to guide. We explain how we diagnose the issue, lift pavers, address offending roots, rebuild a stable base and prevent repeat movement.
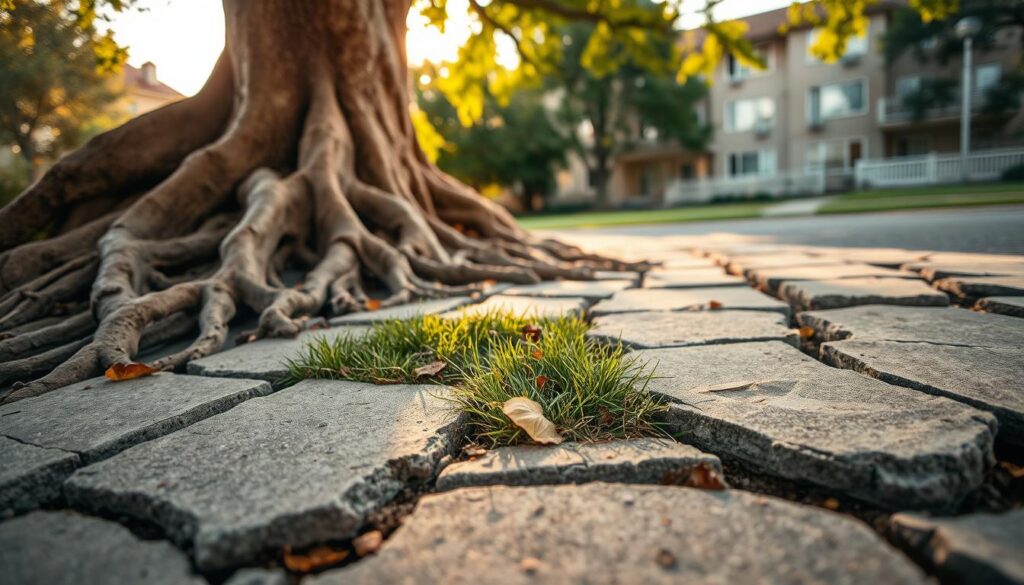
Lifted paving often shows as raised slabs or gaps on patios, driveways and walkways. Acting quickly limits wider damage to your property and avoids costly foundation or plumbing problems.
We are local: our approach suits South Africa’s soils and climate and considers busy access routes near Centurion Mall and gardens around Irene. Tree Felling Centurion helps homeowners assess causes and choose safe, lasting repair options.
Read on for step-by-step methods and a soft call to request a quote later in the article. Please confirm exact location and access details before any work starts so we can plan the right service – Get My Free Quote
Why lifted paving happens in Centurion gardens and driveways
In many Centurion gardens and drives, raised slabs start when underground growth seeks moisture and space beneath the surface. We see this most where soil is compacted or seasonally dry, creating easy channels under the surface.
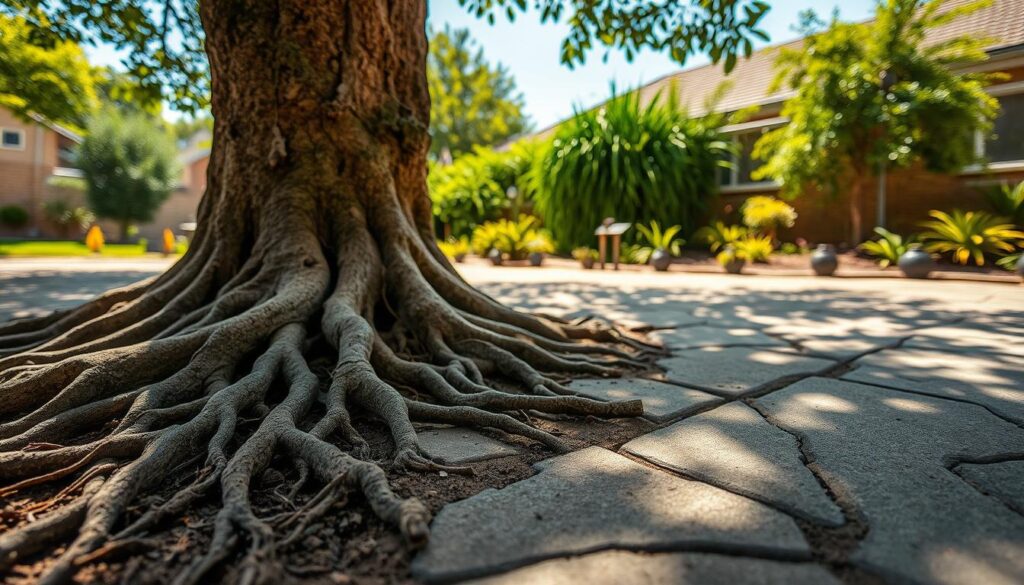
How underground growth searches for water and air
Young growth expands outward in search of water and oxygen. Where soil compaction forces movement, pressure builds and small heaves form beneath a hard surface.
Why lawns, irrigation and drains attract movement
Irrigation lines, lawn edges and leaking drains create steady moisture. That moisture draws underground growth close to pipes and slabs, increasing the risk of damage to plumbing and adjacent paving.
Common surfaces and added stresses
We often work on pool surrounds, patios, garden paths and driveways. Heavy traffic from cars and frequent footfall worsen an unstable base and turn small shifts into visible issues.
| Problem Zone | Typical Cause | Quick Sign |
|---|---|---|
| Pool surrounds | Moisture from splash and drains | Wavy slabs and gaps |
| Patios & garden paths | Compacted soil and wet edges | Rocking pavers |
| Driveways | Weight over shifting base | Cracked or uneven surface |
Spot the early warning signs before the damage spreads
When a walkway no longer feels even underfoot, that’s the moment to inspect before the problem spreads. Early detection keeps repairs small and reduces risk to nearby structures and services.
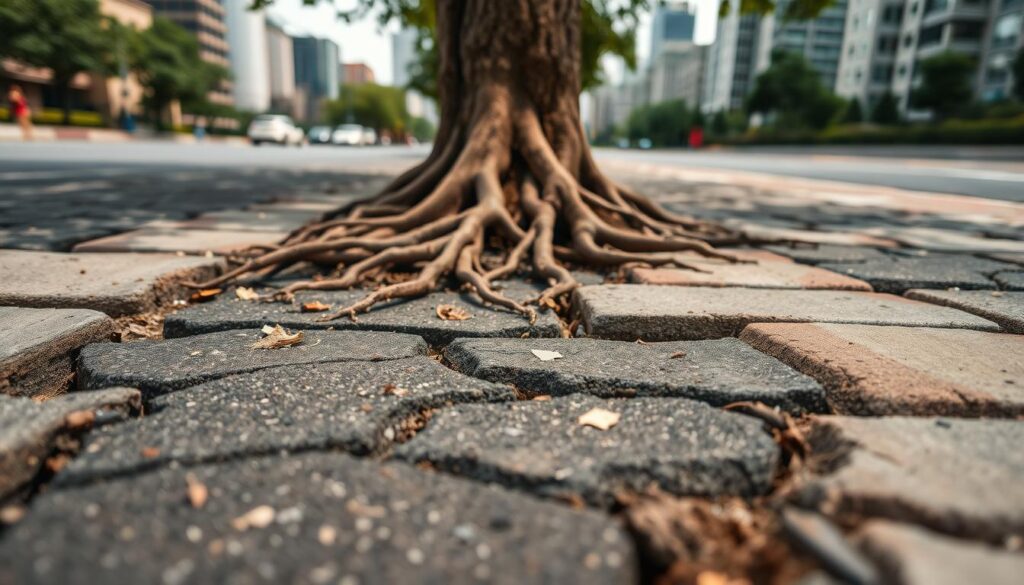
Trip hazards, rocking pavers, and widening joints
You will often feel pavers that rock when stepped on, or notice joints that begin to widen. Edges may open and small height differences soon become real trip hazards around braai and patio areas.
Water pooling, poor drainage, and soil heave after rain
Repeated water pooling after storms shows uneven grading and poor drainage. This draws more moisture into the soil, which can cause soil heave and wash out jointing sand over time.
Secondary risks: stress to retaining walls and nearby foundations
In some cases, movement transfers pressure to edging and retaining walls and can affect a nearby foundation. Redirected water and ongoing erosion raise the chance of wider damage.
- Feel: unstable paving that rocks underfoot and widening joints.
- Risk: small height changes become trips in entertainment spaces.
- Signs after rain: pooling, washed sand and visible soil movement.
- Document: take photos and simple measurements so we can compare cases over time.
Safety and planning checks before you start lifting pavers
Safety starts with a clear plan: we map services and mark safe excavation zones first. A tidy site plan reduces surprises and keeps work flowing.

Utility awareness and why careful planning prevents expensive surprises
We never lift pavers until we confirm underground lines such as irrigation, drains and lighting cables. Marking suspected lines and calling for local utility sweeps stops costly strikes.
Protecting nearby structures, edging, and garden beds
We protect kerbing, steps and boundary walls with temporary bracing to avoid new cracks. Excavation planning sets the working depth and access points to shield these structures.
Practical steps we follow on every job
- Isolate the work area to protect beds and prevent topsoil mixing into the sub-base.
- Work in sections and keep a clear route for wheelbarrows and spoil.
- Choose the right removal method so we remove only what is necessary at the correct depth.
| Check | Why it matters | Our action |
|---|---|---|
| Utility sweep | Prevents service damage | Mark lines, record locations |
| Edge protection | Avoids new cracking | Brace kerbs and steps |
| Soil control | Maintains base integrity | Isolate topsoil and store spoil |
Overall, our team treats every job as a planned service. We follow the lift, inspect, correct, compact and re-lay process to ensure long-term results and proper use of materials.
tree roots lifting paving Centurion: quick diagnosis checklist
A fast on-site diagnosis prevents unnecessary digging and keeps repairs focused on the real cause. Use this short checklist to separate biological pressure from base failure and to record what you find over time.

Confirming root involvement vs subsidence or poor base compaction
- Look for arching patterns: uplift that forms an arc often points to tree roots rather than uniform settlement.
- Visible feeder lines: small exposed tree root strands near lifted joints are a clear indicator.
- Base failure signs: even sinking, soft spots or “pumping” sand after rain suggest poor compaction of the bedding, not root pressure.
- Location clue: lifting concentrated along a tree line or garden bed points to biological spread rather than random ground movement.
Estimating root depth and spread without over-digging
Lift a small test section only. Inspect the bedding and probe gently along the direction of lift. This reveals approximate depth and whether large roots sit under the bedding layer.
Remember: roots often travel beyond the canopy, especially where irrigation or leaks supply extra moisture to the soil.
When the problem is likely to return within days or weeks
- Ongoing irrigation leaks or persistent pooling usually mean quick re-lift in a few days.
- Aggressive tree root strands left flush under paving can reassert pressure soon after repairs.
- Document movement speed with photos and simple measurements. Rapid return signals an unresolved water or biological driver, not a one-off settlement.
Local hotspots and site realities around Centurion landmarks
Local ground behaviour near major landmarks often dictates how quickly surface slabs begin to move.

What we see near Irene’s mature gardens and older properties
In Irene, older properties often have mature trees and legacy bases. These bases were not built for modern loads and can show repeated movement.
Established growth and compacted soil together create a pattern we inspect first on each location.
High-traffic wear by shopping and Gautrain access routes
Near the mall and Gautrain access, heavy turning and foot traffic speed joint wash-out. Vehicle braking creates uneven stress on the paving and the sub-base.
Newer estates towards Mall of Africa
Recent developments used filled ground and rapid landscaping. The area can settle over months, causing unexpected shifts in level and drainage.
Green-belt edges by Rietvlei Nature Reserve
Natural water movement and seasonal wet patches near reserves encourage spread from thriving trees. These areas often combine water, unstable soil and biological growth.
Practical takeaway: each hotspot has a likely cause mix — trees + water + compaction — and we tailor the repair to that mix. A quick surface patch rarely lasts when local soil and water behaviour drives the problem.
| Hotspot | Typical cause mix | Common sign |
|---|---|---|
| Irene older gardens | Mature trees, compacted soil | Repeated surface movement |
| Mall & transport routes | Traffic stress, joint wash-out | Widened joints, rocking slabs |
| New estates (Mall of Africa) | Filled ground, settling | Slow subsidence, pooling water |
| Rietvlei edges | Wet patches, thriving vegetation | Seasonal heave and spread |
Tools, materials, and prep for a clean repair
A tidy prep stage and correct kit is the difference between a short fix and a lasting repair. Gather essentials, mark a clean work zone and plan spoil handling before you lift a single unit.

Essential hand tools and when we use them
- Rubber mallet: seat pavers gently without cracking.
- Pry bars: lift slabs and protect edges while avoiding chips.
- Trowel & screed rails: level the bedding layer for accurate fall.
- Spirit level: confirm slope and uniform height before jointing.
- Hand tamper or plate compactor: compact each layer to prevent rapid return of movement.
Base materials and why compaction matters
Use a firm sub-base for strength, a sharp sand bedding for levelling and jointing sand to lock units in place. Good compaction binds layers and gives a long-lasting surface.
Correct compaction is often the line between a three-month repair and a multi-year result. We advise checking moisture in the soil and compacting in thin lifts for best outcomes.
Quick reference for DIY use
| Item | Typical use | Tip |
|---|---|---|
| Sub-base aggregate | Strength under slabs | Compact in 50mm layers |
| Bedding sand | Level and set | Screed to correct fall |
| Jointing sand | Lock pavers | Brush in and compact |
| Compactor | Compress layers | Hire for larger jobs |
Our services bring the right kit and experience earned over years on local jobs. Follow these steps and you will match much of our process for a neat, durable repair.
Step-by-step repair process: lift, clear roots, rebuild the base, re-lay
We follow a clear, step‑by‑step routine that protects utilities and restores a safe surface. This process keeps repairs focused and reduces the chance of repeat movement.
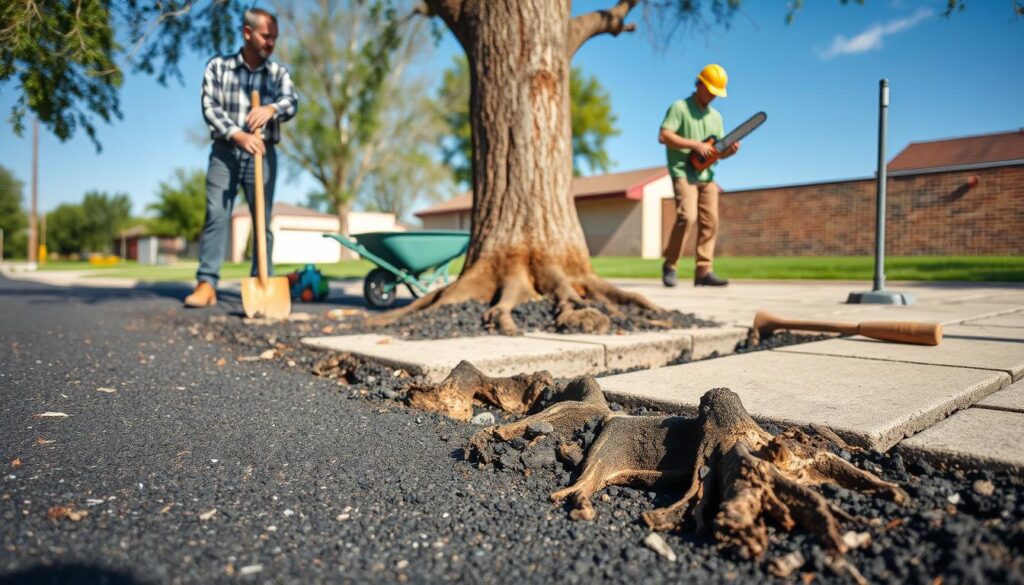
Lifting and stacking
We lift units systematically from an edge, label matching patterns and stack neatly to avoid cracking and colour mismatch on re‑lay.
Expose and inspect
Remove bedding sand carefully until the offending growth is visible. We probe to check depth and whether the stable base needs only minor correction.
Controlled removal and safety
Light trimming can stop short recurrence. Full removal or excavation is only done after assessing stability and nearby services to prevent damage property.
“Never hack large structural roots without checking tree stability or service lines.”
Rebuild, level and re-lay
Backfill in thin layers, compact each lift and restore the correct sub‑base and bedding. Set a gentle fall to move water away from buildings.
Place units back, confirm levels, brush in jointing sand and reinstate edge restraint. Final clean‑up and advice on safe use completes the job.
When root excavation and soil levelling are the best long-term fix
Deciding to dig is about understanding the whole site and solving the cause, not just the symptom. We recommend escalation when small repairs fail, large areas become uneven, or drainage keeps washing out the base.
What “root mapping” and soil profiling achieve during a site assessment
Root mapping means tracing where problem root lines run so we remove only what is necessary and protect nearby systems.
Soil profiling reveals fill versus natural soil, moisture behaviour and compaction needs. Together they stop repeated issues by targeting the real cause.
Choosing an excavation depth that suits paving and nearby structures
We select depth by use and risk: light walkways usually need 150 mm of correct bedding, while heavy driveways or work near a foundation may require excavation to 1.5 m. Deeper is not always better — access, services and nearby structures guide the plan.
How proper grading reduces erosion, flooding, and repeat lifting
Correct grading moves water away from slabs and foundations. That reduces erosion, prevents pooling and lowers the chance of repeat movement.
“A mapped site and right-depth plan turn temporary fixes into a lasting repair.”
Once we confirm access, soil type and scope, we can provide a clear quote.
Stump and root system solutions when the tree has been removed
A cut trunk left in place does not always mean the underground system has stopped working. A visible stump can seem dead while the system still moves moisture and nutrients for a short while.
Why a stump can stay biologically active
After a tree removed, the central wood may retain life. Small living tissues nearby keep supporting slow growth.
That ongoing activity lets some roots continue to shift soil and disturb nearby surfaces.
Stump grinding versus leaving it to rot
We favour stump grinding when reclaiming usable space matters. Grinding is quicker and drops the risk of future movement under slabs.
Leaving a stump to rot can invite fungus and pests and reduces safe garden area for planting.
Mulch, the hole and what to expect
Grinding produces wood chips and mulch. We either reuse this material in beds or remove excess to avoid nitrogen drawdown near a new plant.
The hole is backfilled, compacted and finished level so the area is ready for new surfacing or planting within a short time.
“Stump removal restores space quickly and cuts the chance of repeat underground movement.”
| Option | Benefit | Impact on roots |
|---|---|---|
| Grind stump | Fast reclaim of garden space | Reduces active root pressure |
| Leave to rot | No immediate cost | Slow decay; ongoing disturbance |
| Grind + reuse mulch | Cost-effective soil cover | Supports plants if managed correctly |
Preventing repeat problems with smarter design and planting
Plan for full-grown size when you set out new beds and hard surfaces. Good design treats planting as a long-term decision, not a one-season choice.
We place barriers and leave space so the trunk can expand and lateral movement is less likely. A root barrier, correctly installed, redirects underground growth away from edges and reduces pressure on nearby surfaces.
Root barriers, spacing and allowance for trunk swelling
Spacing rules help: allow planting distances based on expected full-grown size and trunk spread. For compact yards we add at least half the mature canopy radius between a specimen and any hard surface.
Picking species for your available space
Choose species with non-invasive systems if space is tight. Match plant selection to soil, rainfall and the final size you can accommodate to avoid problems later.
Examples linked to structural pressure in Gauteng gardens
Some local species often linked to pressure near surfaces include Celtis sinensis, Jacaranda mimosifolia and Ligustrum lucidum. Others to watch are Melia azedarach, Morus nigra, Solanum mauritianum and Tecoma stans.
Water-wise irrigation habits that reduce chasing moisture under slabs
Fix leaks quickly and keep watering set for deep, infrequent cycles. This encourages deeper systems rather than shallow spread that seeks moisture under slabs.
“Good planting and simple barriers reduce repeat work, protect walkways and keep maintenance low.”
| Measure | Benefit | Practical tip |
|---|---|---|
| Root barriers | Redirects underground growth | Install vertical barrier 300–500 mm deep |
| Correct spacing | Allows trunk swelling and canopy spread | Use mature canopy radius ÷ 2 as minimum distance |
| Species choice | Reduces invasive systems | Pick smaller, non-invasive species for tight gardens |
When to call Tree Felling Centurion and what we do differently
If you notice repeated surface movement, signs of plumbing interference, large mature specimens close to hard surfaces, or any stress to nearby walls, it is time to call Tree Felling Centurion. Early intervention keeps repairs smaller and safer.
How we assess risk to paving, plumbing, and nearby structures
Our site-led assessment combines root mapping, soil profiling, land-use review and a focused risk analysis. We inspect paving behaviour, drainage lines and any possible threat to pipes or foundations.
We check service locations first to avoid surprises, then estimate the depth and spread that influence the repair scope.
Our process focus: safety-driven planning, precise removal, and tidy finishing
Safety guides every decision. We perform utility sweeps, plan access, and use controlled removal where required to limit disturbance. The team works methodically so the removal targets only the problem lines.
“We prioritise safe, minimal intervention and a clean finish so you get a usable surface, not a half-done job.”
Final tasks include tidy stacking, correct backfill, compaction and reinstatement so the site is left safe and ready for use.
What influences timelines and scope on a Centurion property
Several local factors affect time and cost: access (narrow side passages), surface area, required depth, disposal needs, and proximity to high-traffic zones such as Centurion Mall or Gautrain routes and leafy Irene areas.
We provide an accurate quote based on what we find on site, not a guess. Soil type, access constraints and spread vary across locations, so each quote reflects actual conditions.
- Call triggers: repeated movement, suspected plumbing impact, large specimens near surfacing, or visible structural stress.
- Assessment: we examine paving, drainage, soil and risk to structures and plumbing before any work.
- Process: utility awareness, controlled removal, careful reinstatement and full clean-up.
- Quoting: site-driven estimates that match the true scope and local conditions.
Ready to Fix Your Uneven Paving in Centurion? Request Your Free Quote Today!
A concise wrap-up helps you decide when a small patch will do and when thorough soil work is needed.
Core takeaway: uplift is usually a mix of moisture, biological pressure and base performance, so lasting repairs must address all three — correct excavation, compaction and grading.
Act early to remove trip hazards and avoid wider damage property. Use the diagnosis checklist and consider whether a local repair or a deeper rebuild suits your location and use (walkway vs driveway).
Good compaction and clear drainage protect your surface long-term and cut repeat movement after storms or irrigation cycles. Gather photos, note how fast movement returns and then request a quote based on real site conditions and access.
With planned work we help keep shade, usable space and healthy gardens for years.

